Introduction to WindowsSCOPE Live
Introduction to WindowsSCOPE Live https://www.windowsscope.com/wp-content/uploads/2016/07/wscl_intro_blog_1.jpg 727 447 WindowsSCOPE WindowsSCOPE https://www.windowsscope.com/wp-content/uploads/2016/07/wscl_intro_blog_1.jpgStep 1 – Setting up your WindowsSCOPE Live Server
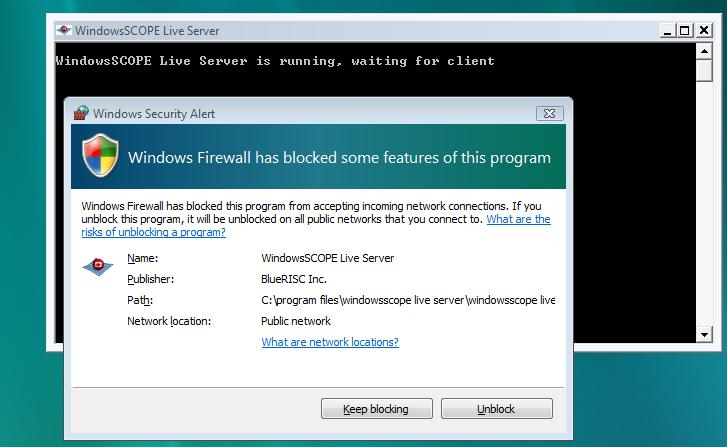
The first step in getting WindowsSCOPE Live running is to download and install the WindowsSCOPE Live server. You can get the server on the WindowsSCOPE downloads page, here, after registering. To install WindowsSCOPE Live Server, simply run the installer and follow the steps. Then run the server program, which you will find in the start menu. The first time you run the server you may get a notification that your firewall is blocking the program. For the server to work, you will need to add a firewall exception by clicking the “Unblock” button, as shown in the screen shot below:

Step 2 – Installing the Client on your Mobile Device
In this example we will go through the process of installing the client on an Android 2.1 or later mobile device. If you go to the Android marketplace and search for “WindowsSCOPE”, you will find the “WindowsSCOPE Live” app by BlueRiSC Inc. Simply click through the Android Marketplace to download and install it. You can also get the android app through the WindowsSCOPE downloads page, here.
Step 3 – Configuring WindowsSCOPE Live
The first part of configuring WindowsSCOPE Live is to figure out the IP address of the computer that you installed the server on. If you don’t already know this IP address you can quickly find it by opening a command prompt (just type “cmd.exe” in the search bar on the start menu). In the command prompt enter the command “ipconfig” and press enter. In the list you see, look for either a “Wireless LAN Adapter” or “Ethernet Adapter” with an IPV4 address listed under it. The group of numbers listed after it is your IP address, which will typically start with “192.168”. An example of the output from ipconfig is shown below, where you will see the computer’s IP address circled in red:

Now, on your mobile device, run WindowsSCOPE Live. You will get a message reminding you that you must have the server installed and running on the computer you try connecting to (so if your server isn’t running, now would be a good time to start it up). Now you will need to create a profile for the server you want to connect to. On the main screen, click on the “Configuration” button. On this screen” click the button “Create New Profile” at the bottom. In the “Name” field, enter a name you want to describe this profile (such as “My work computer” or “My laptop at home”). In the IP address field, enter the IP address for your server that you found using ipconfig earlier. Later on, you can create additional profiles for any number of computers you want to connect to from your phone. You can also come back to this screen later to edit any of your profiles, in case any of your computers’ IP addresses change. Now, click “OK” and then use either the back button on your device or the home button at the top of the screen to get back to the main screen.
Now there is one last configuration that you need to make for your server. This is to add your mobile device to the “whitelist” which gives the device permission to connect to your server. From the main screen, click on “IDT”, “SSDT”, or “Sockets”, to have your device attempt to connect to your server. Since your device hasn’t been added to the whitelist yet, the server will refuse your connection attempt. Now, go to the WindowsSCOPE Live Server window on the computer, and you will see a message: “Received a connection attempt from a device…” followed by the MAC address of the device you tried connecting with. Copy and paste this MAC address into the file “whitelist.txt”. You can find this file in the directory where you installed your WindowsSCOPE Live server, and on Windows Vista and later you will need to run your text editor as administrator to be able to modify it. After you add the MAC address to the file you will need to save it. You can see an example of the “whitelist.txt” file with a MAC address added in the screen shot below:

Now your device will be able to connect to the server so you can perform remote cyber-analysis and memory forensics from your phone or tablet. You can use these same steps to install the server on as many computers as you need to or to allow other devices connect to your servers.
